| | Home | Get It | Register | Get Server | Help | About | Chuckles' PicView | Contact Buddy | |
|
Set up and run a Family Photo Buddy Server See the Share Pictures page for information about getting your own Family Photo Buddy Server. The instructions below assume you already have the server and are setting it up. (Install Family Photo Buddy Server on the computer that will run it.) When the Family Photo Buddy Server is running, you will see an icon in
your Windows task bar like below. If the server is already running, double click it in the task bar. Otherwise, start it
now from the Windows Start menu - Start->Programs->Family Photo Buddy->Server.
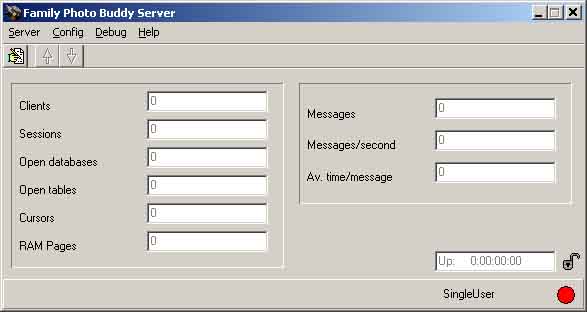
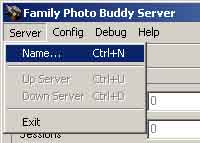
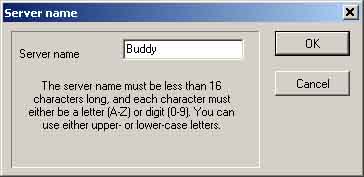
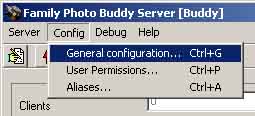
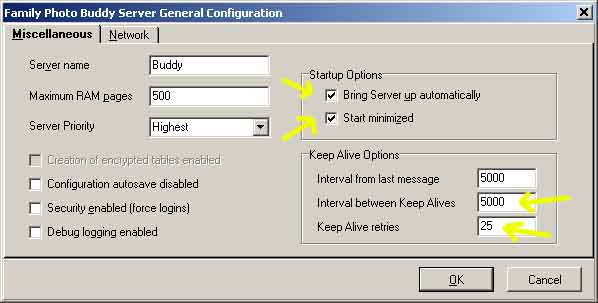
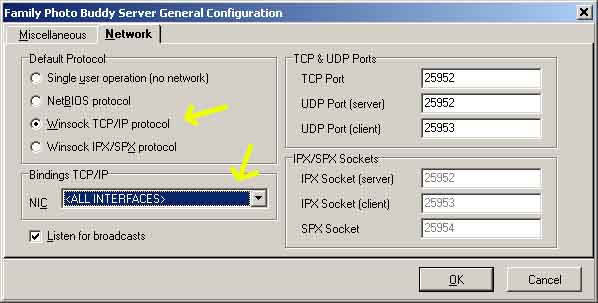
You will first see a window like below. First, name the server by choosing Name... from the Server menu. Enter a name (doesn't really matter what you name it). Click OK. Now choose General configuration... from the Config menu. You'll likely want to make changes noted in the Window below... In the Startup options, checking the two boxes for "Bring Server up automatically" and Start minimized will make startup automatic. Also, you may want to up the number for "Interval between Keep Alives" to 5000 and "Keep Alive retries" to 25. This is especially important over slow Internet connections. Increase it further if you are losing connections often. Now click on the Network tab. Choose the Default Protocol for the network you are using. For example, "Winsock TCP/IP protocol" for the Internet. If you have more than one network card, select ALL INTERFACES to make the server visible on them all (or select the one network card). Note that on this page you could change the Port numbers if you need to. Typically you can leave the port numbers as is. You may also want to note these numbers if you are using a firewall and want the server to communicate through it. Click OK. Almost done! We just have to make some aliases, naming the databases you
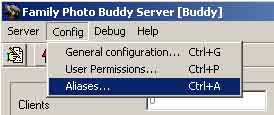
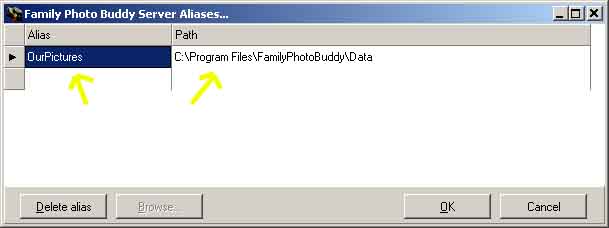
want the server to serve up. On the Config menu, choose Aliases... In the Window below... Enter a name for the database(s) in the Alias column. This name will be listed when people connect to the server. In the Path column, enter the location of your database(s). These will be databases you created in single user mode (it uses the same format). If you don't have any databases yet, run Family Photo Buddy and use New Local Database... in the File menu to make one. Databases (or Aliases) are just directories with the *.FFD files in it (like Images.FFD). Click OK to save the aliases and close the window. We are ready to start this thing up now. Click the up arrow to start
the server. (Clicking the down arrow stops it.) Done! Minimize the Family Photo Buddy Server window now - it is ready for Family Photo Buddy clients to connect. See the Connect to a Family Photo Buddy Server page for instructions for connecting to the server from Family Photo Buddy. You can run Family Photo Buddy on the same computer the server is running on without worry. Family Photo Buddy is typically much faster with a server running on the same computer or local network than when used with local databases.
©2007 Family Photo Buddy. All Rights Reserved. |